Background
This Knowledge Base Article provides a step by step instructions on how to assign the BitScan Scanner to a machine in the factory.
EXAMPLE: Removing the existing scanner for the Sheerline Workspace. Then assign the new BitScan Scanner as the Sheerline Machine from Chrome.
Before you begin
- Ensure you are logged into Elda(Chrome). See our article Log in to an Elda Database for more.
- Ensure you have access to the Scanner Analysis System app in Elda(Chrome) Folder. See our article Getting Started with Scanner Analysis System for more.
Steps to Follow
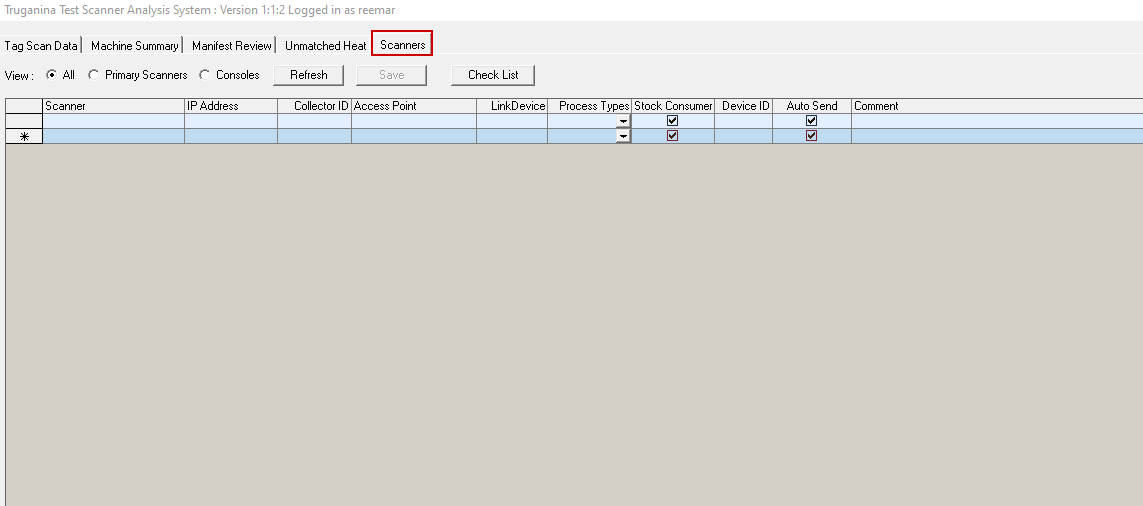
- In the Scanner Analysis System window, click on the Scanners tab.
-
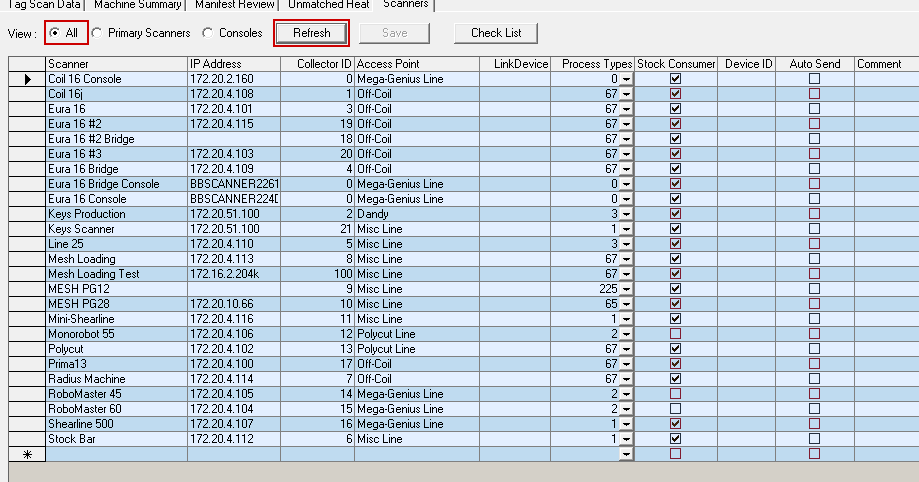
Click on the ALL option and click on the Refresh button. This will display all scanners connected to the machines.
PLEASE NOTE: Scanner is named according to the connected machine in the factory.
-
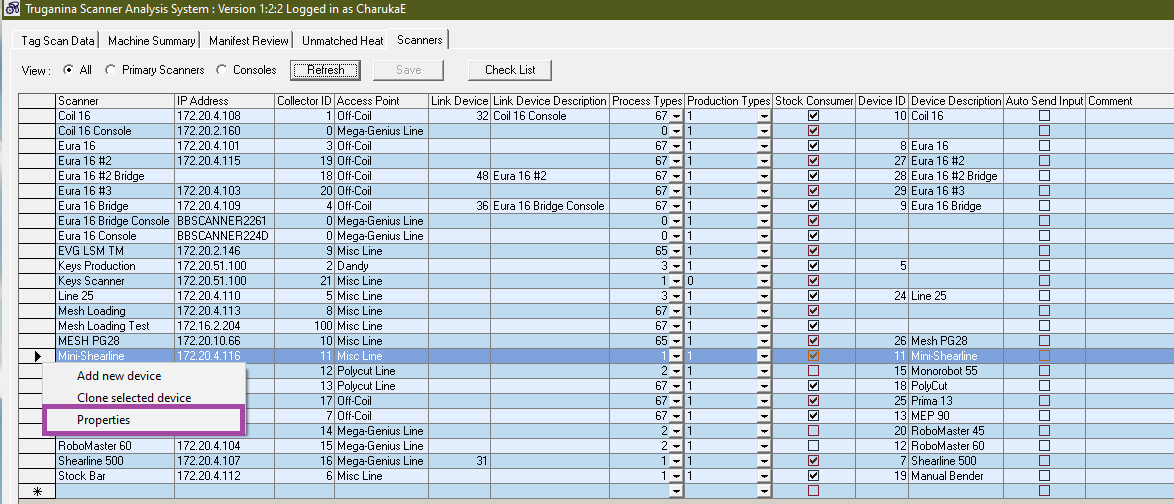
Right-click on the Scanner that needs to be replaced/changed with a new BitScan device and select the Properties option.
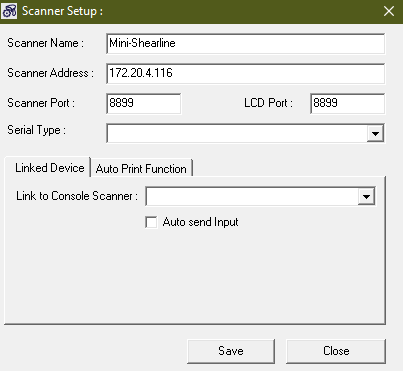
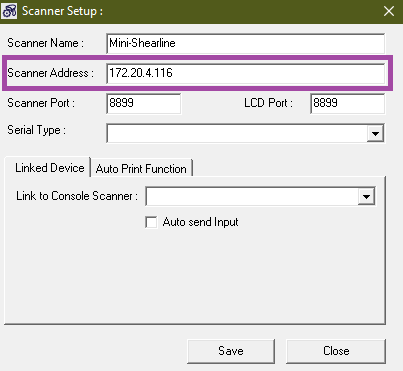
Chrome will open up the Scanner Setup window
-
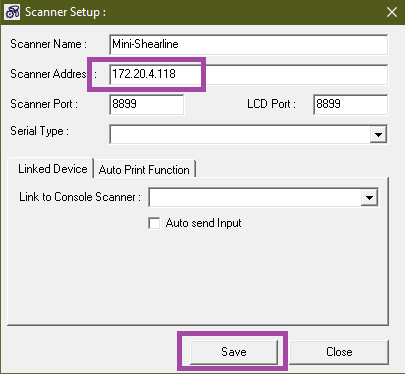
Type in the IP address from the BitScan Scanner in Scanner Address.
-
Confirm the BitScan IP Address
-
Locate the Scanner Address that is already in use.
-
Type in the Bit Scan Scanner IP in the Scanner Address textbox and click on the Save button for the changes to be applied.
-

Reema Reema
Comments