Background
Grouping of schedules allows for quoting of multiple schedules and displaying them in one single print-out, removing the need to send customers individual schedule quotes for one project.
Before you begin
- Ensure you are logged into the Elda (Chrome) Scheduler application. See our article Getting Started with Scheduler for more.
Creating a Schedule Group
1. Within Scheduler, either search the customer name (see our article on Managing Customer Records for more on searching for a customer) or enter the required job number

2. Proceed to select the schedules within the job which you would like to group together.

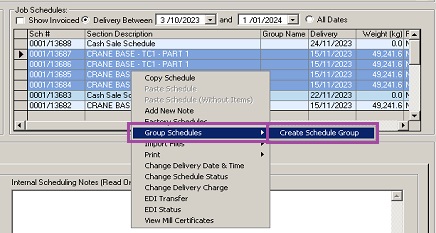
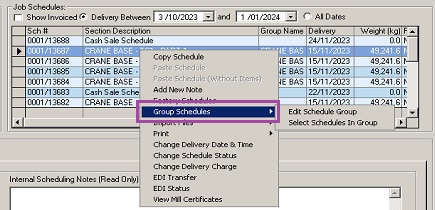
3. Right-click, choose Group Schedules then select Create Schedule Group.
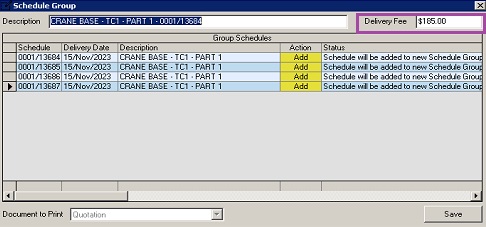
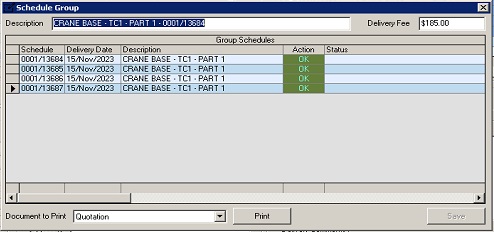
4. The Schedule Group window will appear displaying the selected schedules that will be grouped together in a quote.
PLEASE NOTE: A default delivery fee is calculated and shown the first time a group is created. This field can be edited/updated provided schedules in the group are not ex-works or job weight break.
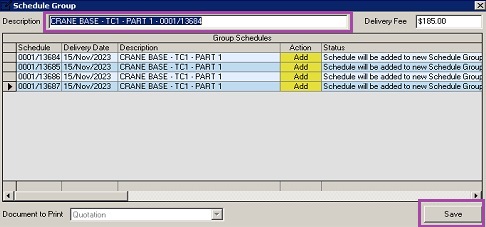
5. Enter a description and select Save. You will be notified that the schedule group has been created.
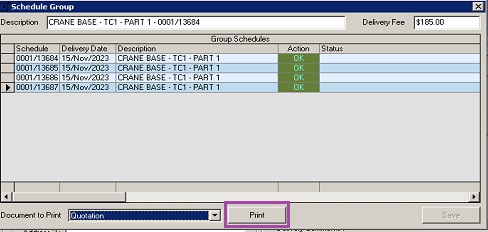
6. Then proceed to select Print. This will display a combined quotation of the selected schedules on the screen, which you can then email to the customer.

Viewing Schedules that are in a Group
1. Enter the job account and select a schedule.
2. Right-click and proceed to Group Schedules.
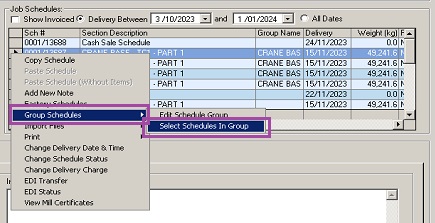
3. You will be prompted to choose from the subcategories. Choose Select Schedules in a Group.
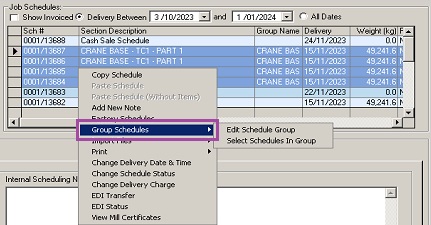
4. This will highlight all schedules within the group for viewing.
Editing a Schedule Group
1. Enter the job account and manually select the schedules relating to the group being edited/updated.
PLEASE NOTE: If a group contains at least one schedule that has been manifested, the group can no longer be modified/updated. Likewise, schedules cannot be canceled unless removed from a group first.
OR
Follow the instructions above under Viewing Schedules that are in a Group for instructions on selecting all schedules with the group.
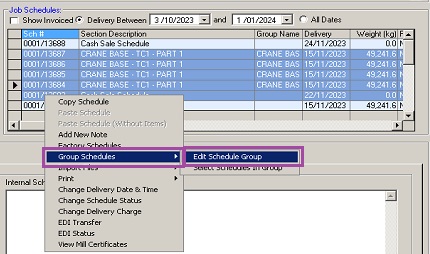
2. Right-click and proceed to Group Schedules.
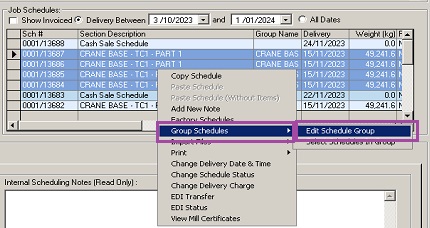
3. Select Edit Schedule Group from the popup menu.
4. The Schedule Group window will appear. This will display all schedules within the group.
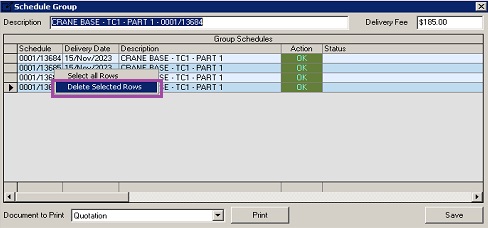
5. To remove a schedule, simply select the schedule, right-click, and opt to delete the selected row. This will remove the schedule from the grouping.
Adding Schedule to an Existing Group
1. Select the schedules within the group – Follow the instructions above under Viewing Schedules that are in a Group for instructions on selecting all schedules with the group.
PLEASE NOTE: If a group contains at least one schedule that has been manifested, the group can no longer be modified/updated.
2. Proceed to select the additional schedule/s – Hold down the CRTL button on your keyboard and click on the schedule you wish to add to highlight it.
3. Right-click, select Group Schedules, then Edit Schedule Group.
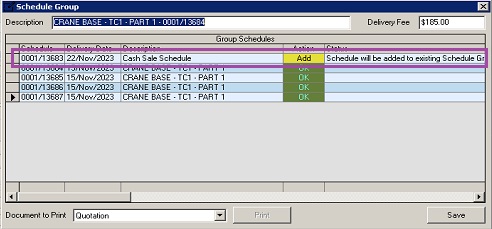
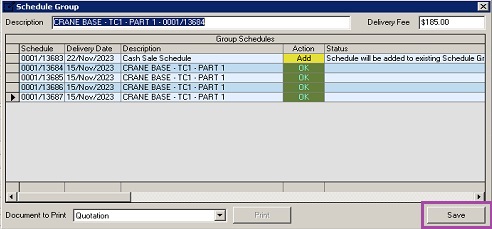
4. The Schedule Group window will appear – The added schedule/s will be displayed with a status of Add under the Action column.
6. To add and save the changes to the grouping, select the Save button.
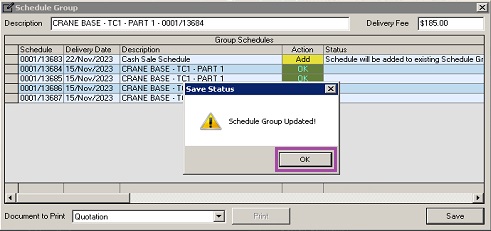
Click OK on the Save Status dialog box.
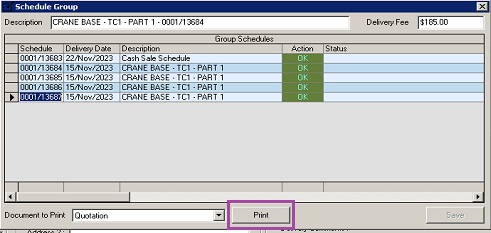
If required, proceed to print or email the updated quote to the customer.






Simon Gray
Comments