Background
This article provides steps in using the tool that allows multiple schedules to be updated in bulk in the Scheduling system.
Before you begin
- Ensure you have access to Scheduler. If you don't see Scheduler in your available Elda (Chrome) shortcuts, you may need to request access to it. Please see our article on how to Request access to an Elda Application.
- You have the right permissions to perform the below steps.
- Bulk schedule Updating only displays open schedules (Created, Queued, Printer, Unlocked, Reserved and Tags Assigned.)
Steps to follow
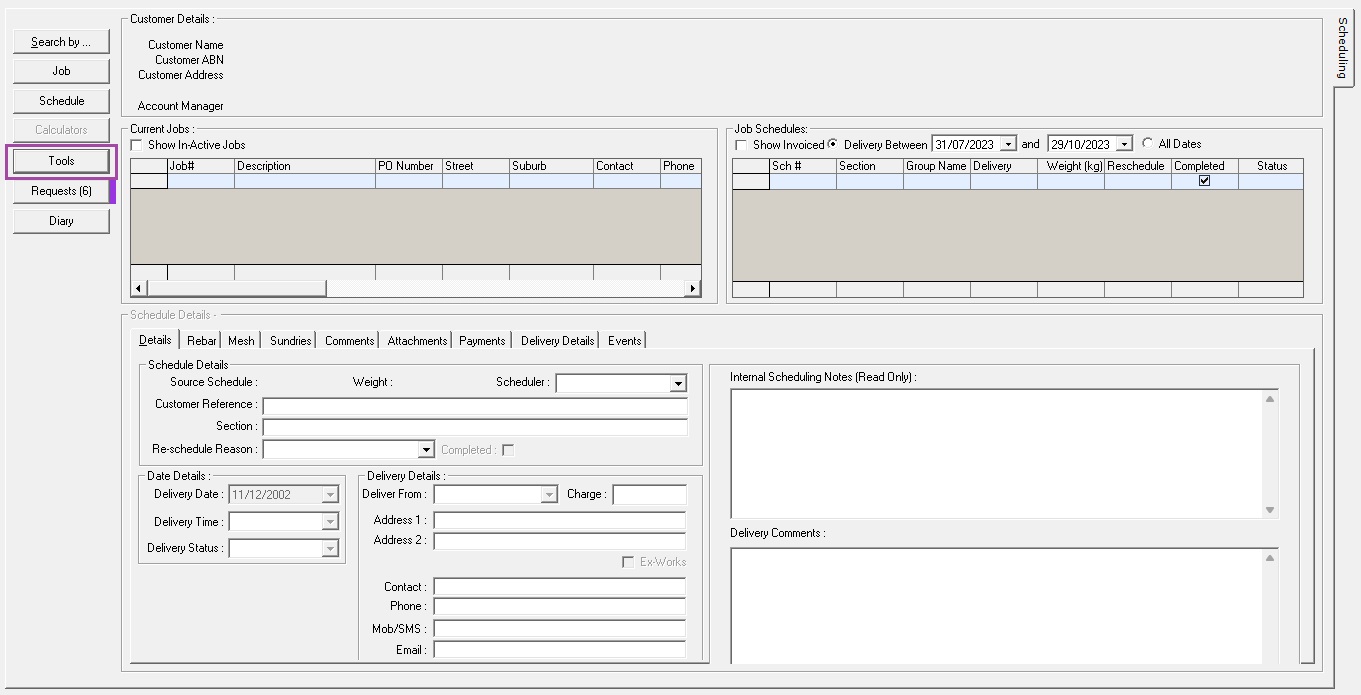
- From the Scheduler menu, select Tools.
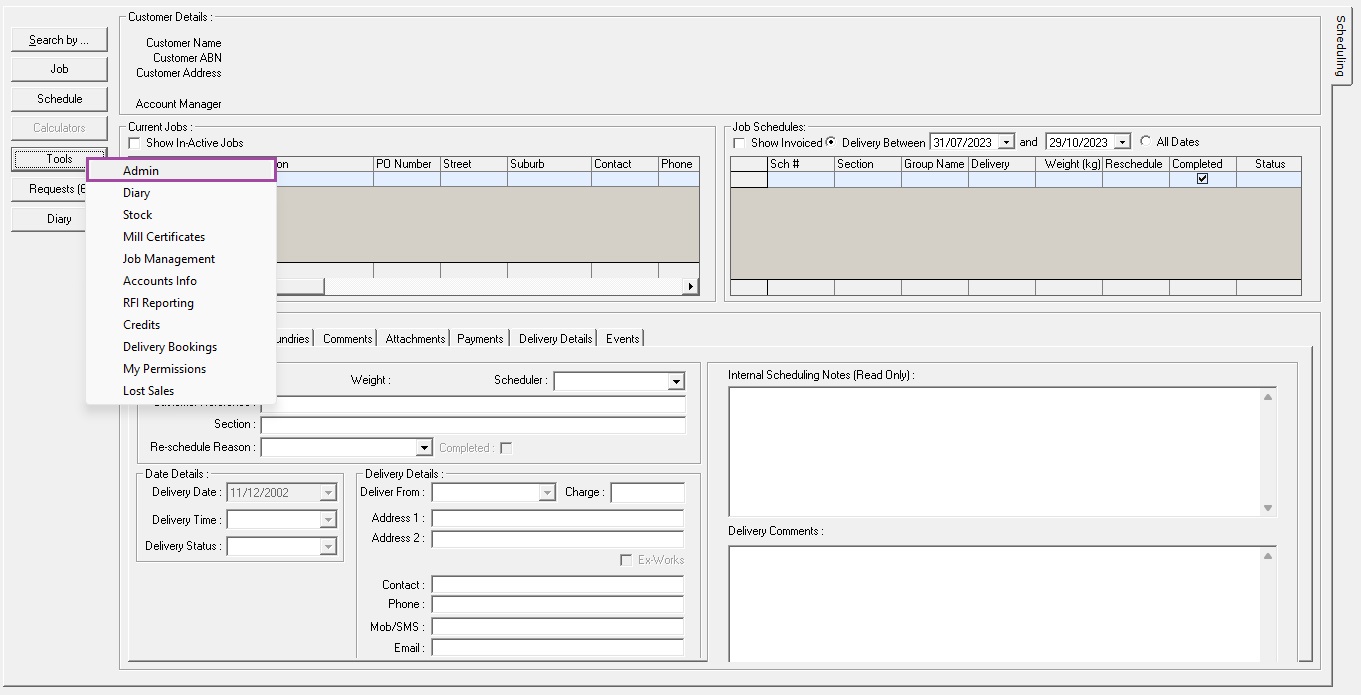
Then click on Admin.
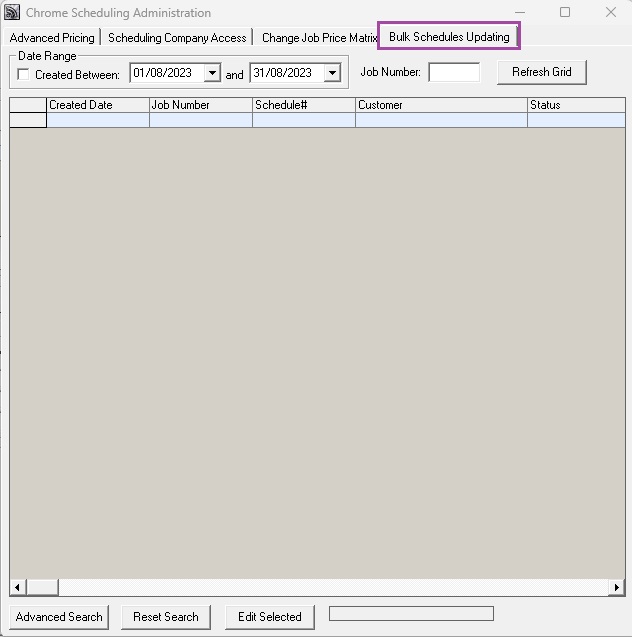
- Navigate to the Bulk Schedules Updating tab.
- The window will display all schedules that have been created but not manifested yet.
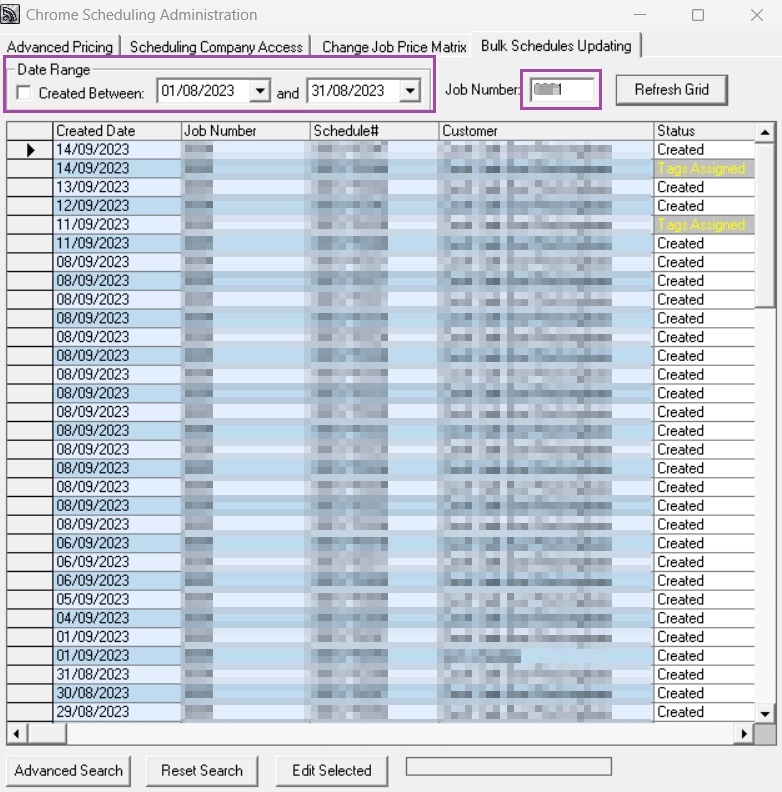
To refine the search and display only the schedules created within a certain timeframe, tick on Created Between and adjust the dates accordingly.
Alternatively, you can enter the job number, and then click on Refresh Grid. All the schedules related to the job that are not manifested will be displayed.
You can maximize the window to view more details.
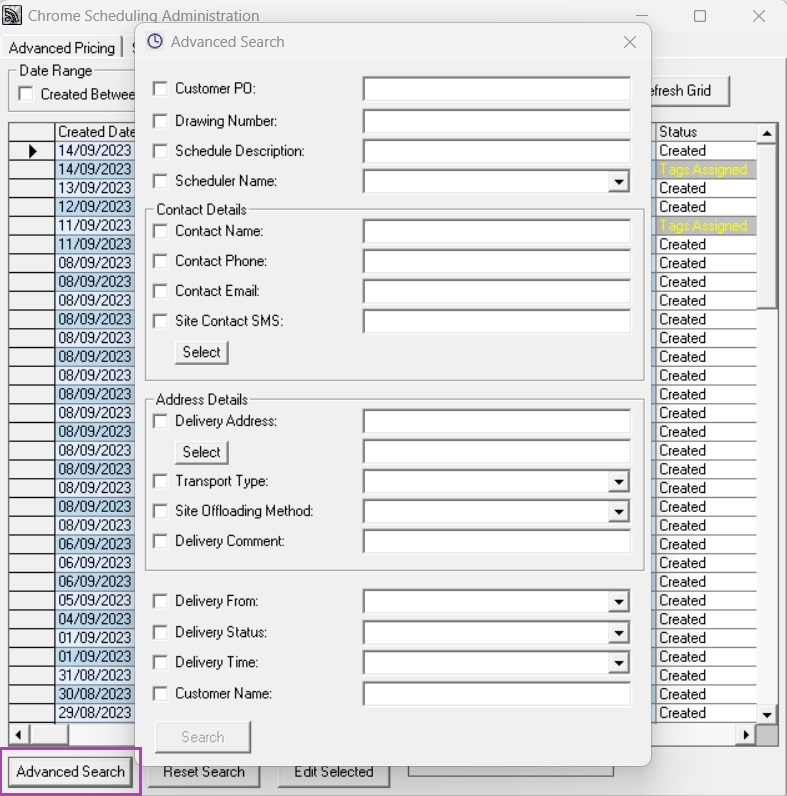
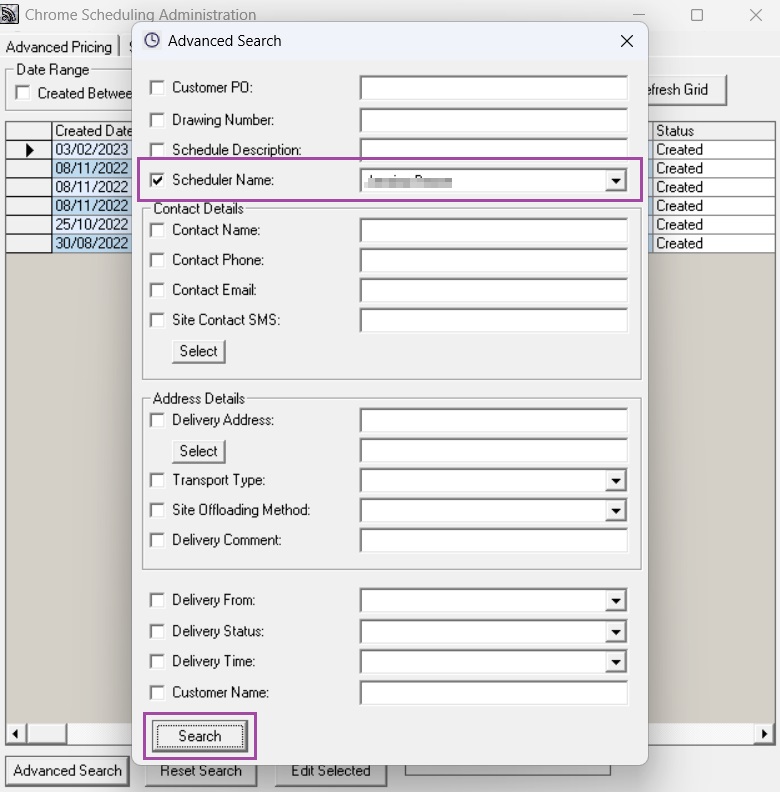
- If the date range filter is not a viable option (i.e., large number of rows returned, unknown date of schedule creation, etc.) you may instead use the Advanced Search option. Click on the Advanced Search button.
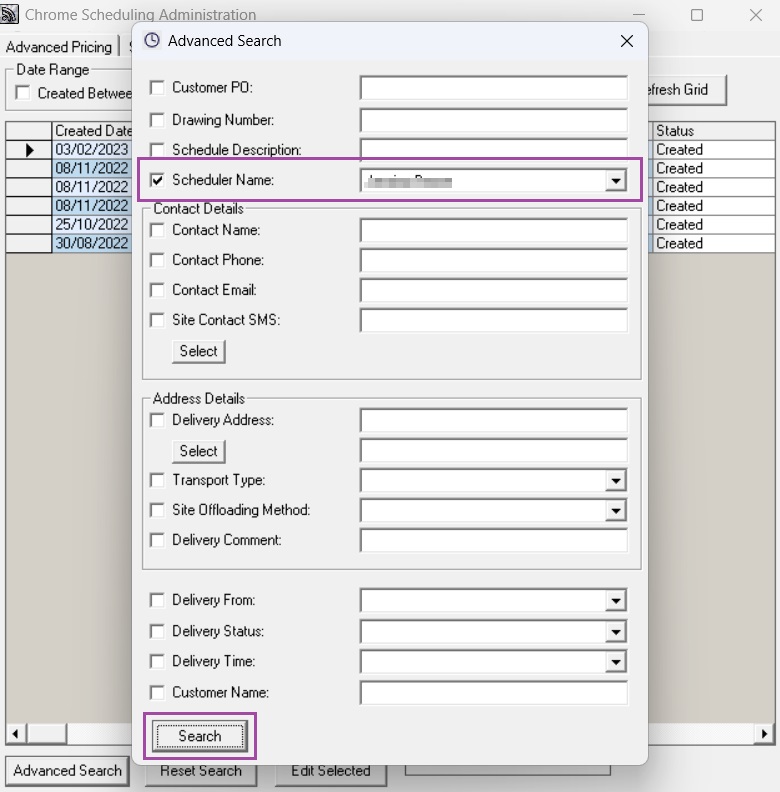
- In the below example, we would like to search for schedules created by a certain scheduler. Tick Scheduler Name, select the name from the drop-down list, then click on the Search button.
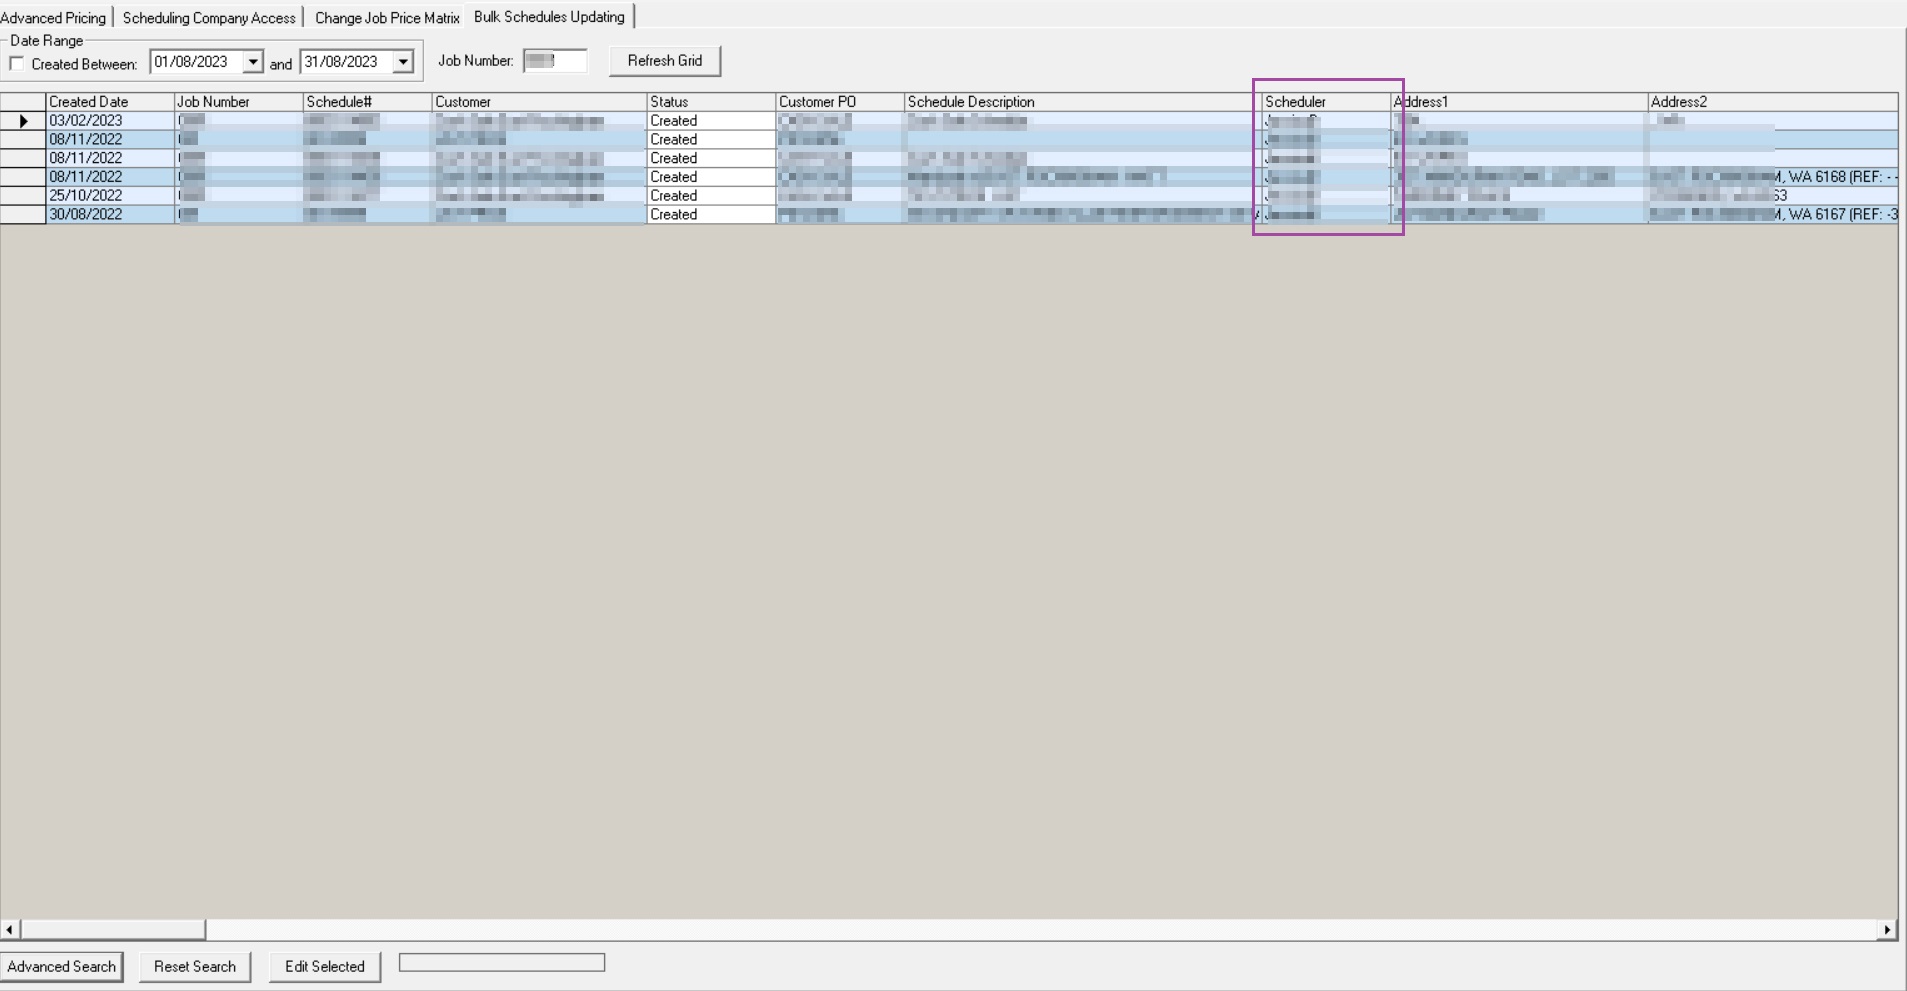
- All schedules created by the scheduler searched is displayed. You can use the horizontal slider to view the rest of the details or you can maximize the window as below.
Or you can maximize the window to view more details.
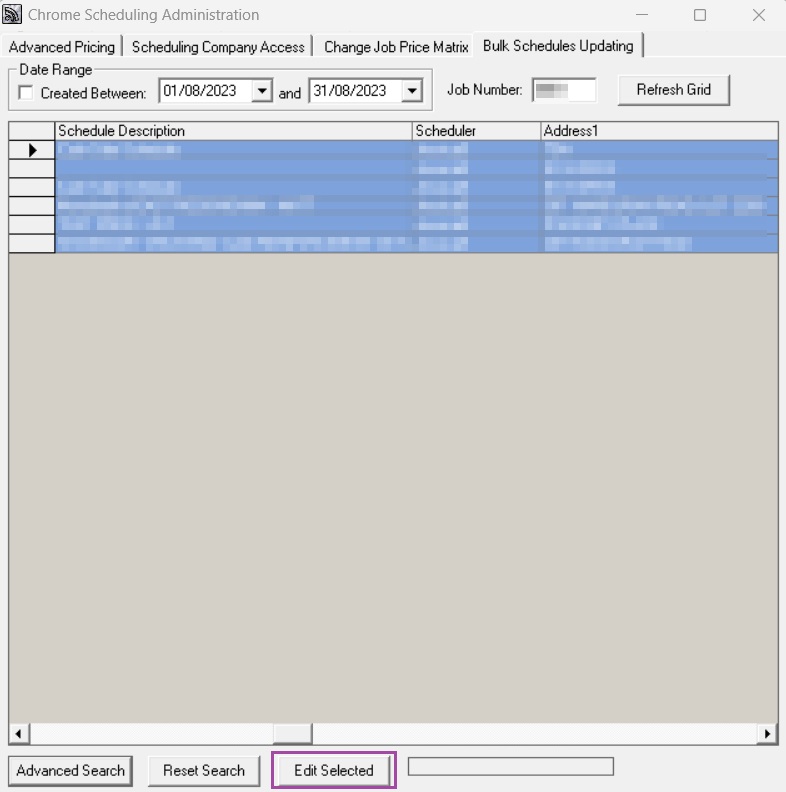
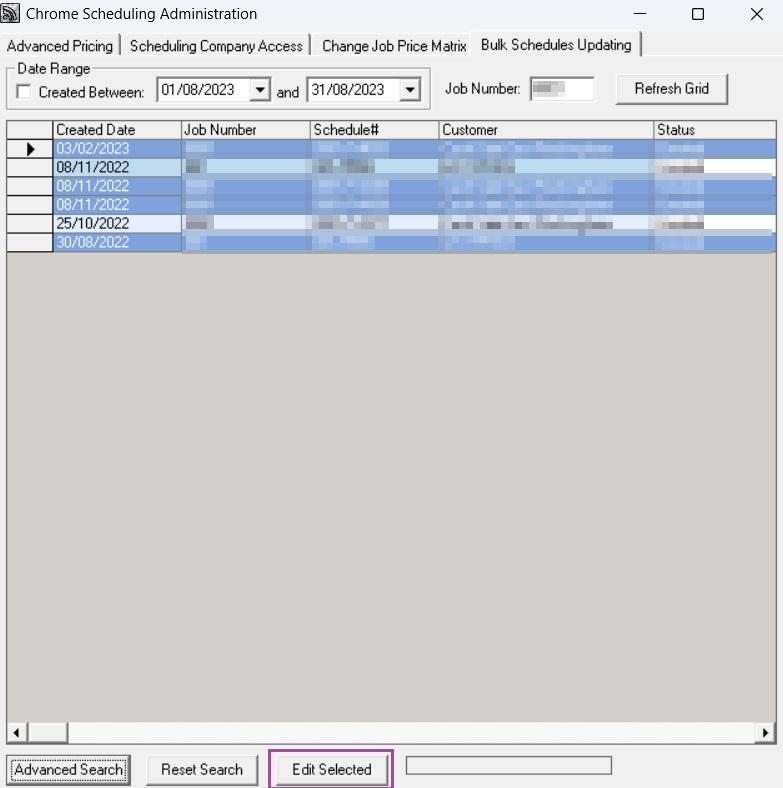
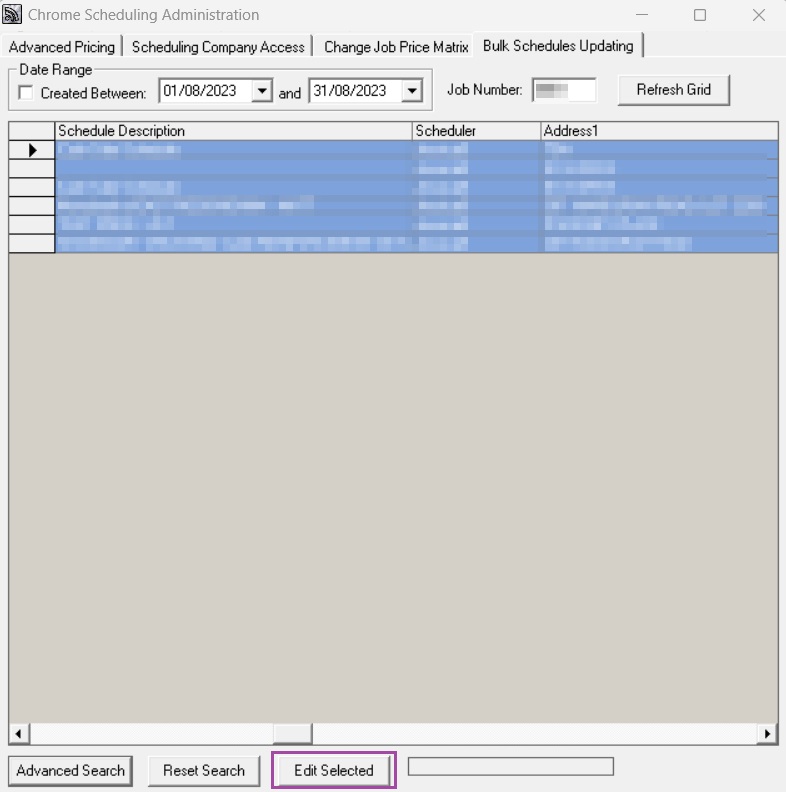
- You can click on Reset Search to search again using a different parameter. To update all the displayed schedules, click on the first row, press the Shift key on your keyboard, then click on the last row. All rows should be highlighted as below. Click on the Edit Selected button to proceed.
To update only specific schedules, press and hold the Ctrl key on your keyboard, then click on the items you want to update. Click on the Edit Selected button to proceed.
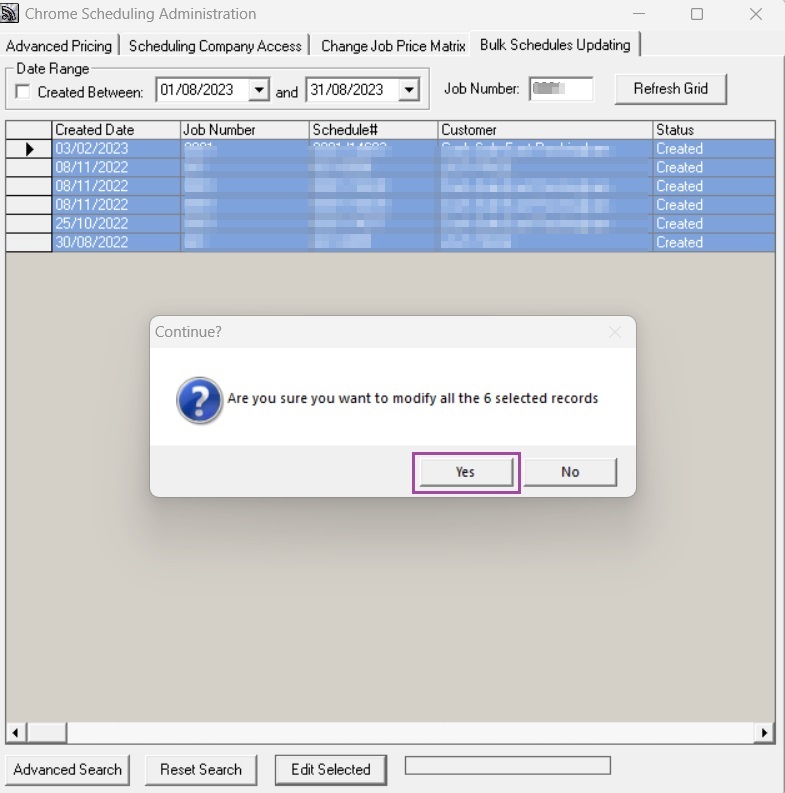
- Click Yes on the dialog box that pops up to confirm your action.
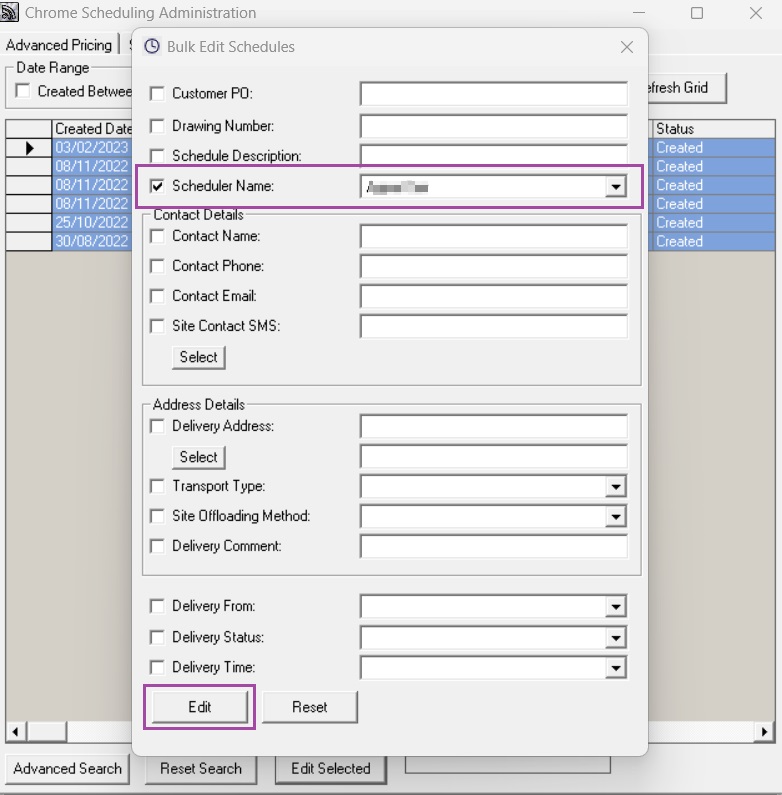
- In the below example, the scheduler name will be updated to another name selected from the drop-down list. Singular or multiple parameters can be updated at the same time. To apply the update, click on Edit. Otherwise, click on Reset to clear the fields of the entered details.
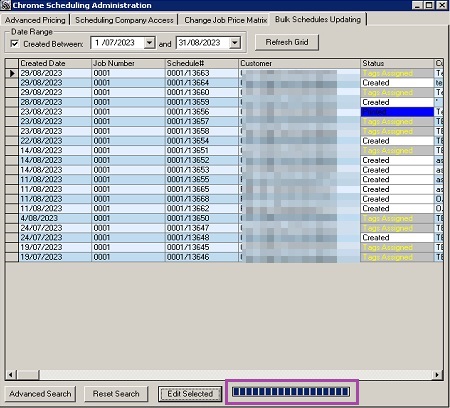
- A blue progress bar appears on the bottom of the screen to signify that the update has been completed.
- To verify, click on Advanced Search again, tick Scheduler Name, then select the scheduler from the drop-down list to whom the schedules were updated to. Click Search.
All rows selected earlier for update now have the new scheduler's name.
Ronil Cabudoc
Comments